
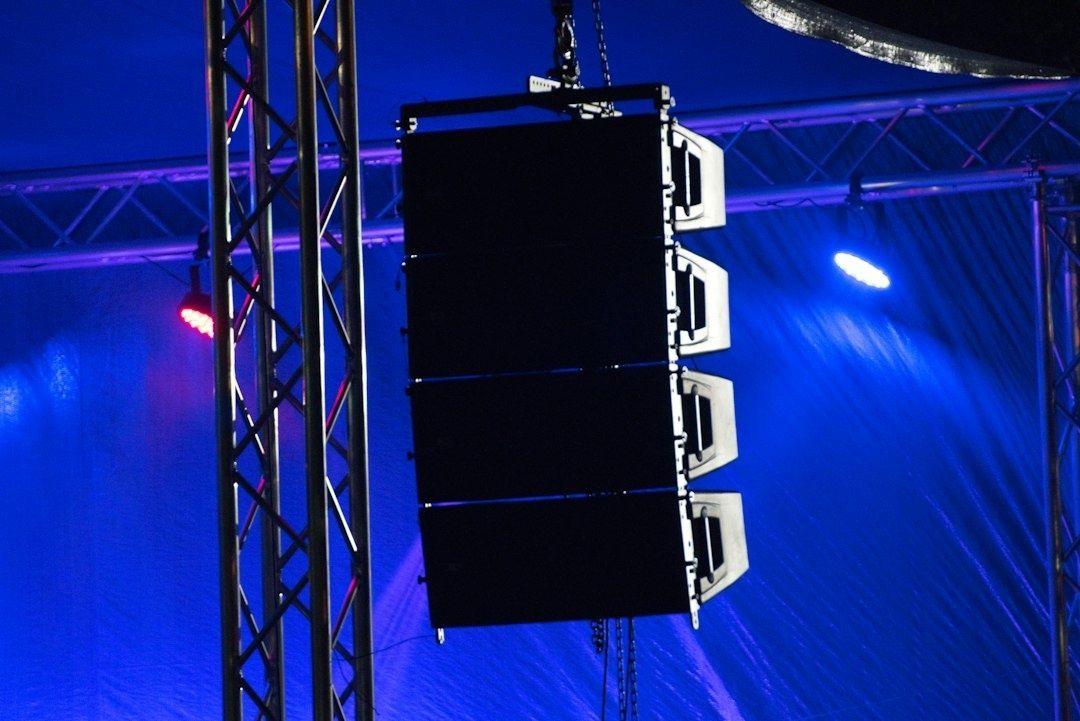
How to Build a High-Energy Dance Floor Under Strict Venue Decibel Limits

Why Decibel Caps Do Not Have to Kill the Party Vibe

The dreaded venue limiter can make an event feel compromised before the first track even plays. Event planners worry about complaints, sound engineers watch the meters, DJs fear sudden gain reduction, and venue managers must protect relationships with neighbors and local authorities. Yet a legal ceiling on measured sound pressure does not automatically mean a flat or lifeless dance floor. It simply changes where the craft begins.

Perceived loudness is a psychoacoustic experience, not a single peak number on a meter. A clean kick, controlled sub-bass, intelligible vocal range, and well-timed musical rise can make a room feel powerful without filling every corner with uncontrolled energy. The winning approach is to move away from raw volume and toward focused physical pressure, precise coverage, and deliberate musical contrast. With the right system design, the dance floor can feel alive while the property line remains protected.
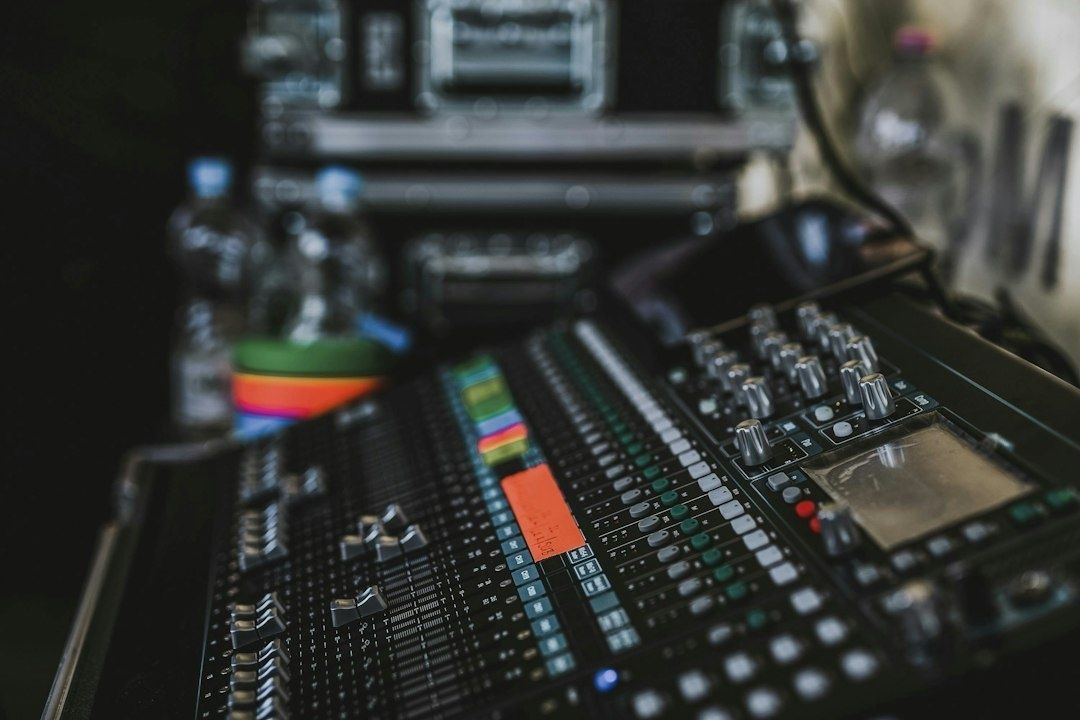
Audio mixing console with faders and controls in a dim venue
A disciplined soundcheck turns decibel limits into a design tool, helping engineers preserve impact while protecting the audience and surrounding community.

Mastering the Measurement Game dBA versus dBC Explained

Sound level meters apply weighting curves because the human ear does not hear every frequency with equal sensitivity. A-weighting, written as dBA, reduces the contribution of very low and very high frequencies and places greater emphasis on the midrange, where hearing is most sensitive at moderate listening levels. This makes dBA useful for many general noise assessments and explains why it is frequently found in venue policies, permits, and municipal guidance.

That usefulness has limits in bass-heavy entertainment. Deep sub-bass may contribute strongly to physical sensation while contributing less to an A-weighted reading. C-weighting, or dBC, applies far less attenuation to low frequencies, giving a clearer picture of the rumble and pressure that can travel through floors, walls, and building structures. A system can therefore appear compliant on a dBA meter while still producing low-frequency disturbance that reaches nearby apartments or businesses. Monitoring both curves gives the engineer a more complete picture of audience impact and neighborhood risk.

Measurement What it emphasizes Practical value for events
dBA Midrange frequencies associated with hearing sensitivity Often used for venue limits and general audience exposure assessments
dBC Low-frequency energy and bass pressure Reveals rumble, structural transmission, and potential neighbor complaints
Peak SPL Short-duration maximum level Helps identify sudden transients that can trigger limiters or discomfort
LAeq Time-averaged A-weighted level Shows how exposure accumulates during a defined listening period

Before soundcheck, confirm exactly what the venue measures, where the microphone is positioned, whether the limit is an average or a peak, and whether separate dBA and dBC thresholds apply. Consult an Authoritative Source for the applicable rules, while Local noise code guidance illustrates why regulations must be checked before the event rather than interpreted during a crisis. Meter placement, calibration, reflective surfaces, building construction, and the measurement time window can all affect the result. A responsible engineer should also keep a second monitoring position near the most sensitive boundary when practical.

Directional Acoustic Physics Subwoofer Arrays That Protect Property Lines

Standard subwoofer placement often wastes energy. A single cabinet or loosely spaced pair radiates substantial low-frequency output behind the DJ booth and toward side walls, where it contributes little to the dancers but can excite the venue structure. Low frequencies are difficult to contain with ordinary barriers, so the strongest solution is usually directional control at the source.

Cardioid subwoofer arrays use carefully timed sources and phase relationships to reinforce bass toward the audience while creating cancellation toward the rear. End-fire arrangements place cabinets in a line with progressive delay, while gradient arrangements use front and rear sources with polarity and delay adjustments. The result is not perfect isolation, and room reflections still matter, but rear rejection can significantly reduce unnecessary energy outside the dance zone. Modern powered subs with DSP can simplify this work through presets, alignment delay, polarity inversion, crossover control, and dedicated cardioid modes. For example, the DRM18S powered subwoofer includes system processing and cardioid-array support designed for professional deployment.

  1. Map the room first. Mark the dance floor, DJ position, audience edges, walls, residential boundaries, and any elevated or vulnerable structures. The array should face the people who need the energy, not simply the geometric center of the room.
  2. Choose the array geometry. Use a gradient configuration when rear rejection is the primary concern and an end-fire configuration when forward directivity and extended throw are more important. Follow the manufacturer”s spacing and processing requirements rather than improvising cabinet distances.
  3. Apply delay and polarity carefully. Set the manufacturer”s recommended DSP values, verify polarity, and confirm that cabinets are acoustically aligned at the intended listening position. Small timing errors can reduce forward summation and weaken the very punch the array is meant to create.
  4. Measure front and rear positions. Compare levels and frequency response in front of the array, behind it, and at the property-line direction. Check both dBA and dBC, because rear rejection that looks impressive in one weighting may be less effective in another.
  5. Lock the system after verification. Protect the DSP settings from accidental changes, establish a conservative operating limit, and communicate the approved gain structure to the DJ and production team.

Array control works best when combined with sensible crossover choices. Excessive sub overlap with the tops can make the low-mid region thick, reducing clarity while increasing meter activity. A clean crossover, controlled infrasonic content, and high-pass filtering where appropriate often produce a stronger kick because each system component is working within its useful range. The objective is not maximum subwoofer output everywhere. It is a concentrated, coherent impact where the crowd is dancing.

Focusing the Mid-High Energy Down-Tilting and Zone Management

Mid and high frequencies are easier to direct than sub-bass, which makes speaker aiming one of the most valuable tools under a strict limit. Point-source speakers aimed horizontally can send sound into rear walls, windows, corridors, and chill-out areas. Those reflections increase room wash, reduce intelligibility, and create complaints without adding much value to the main floor.

Down-tilting the main speakers places high-frequency energy into the audience rather than above it. Human bodies absorb significant mid and high-frequency content, especially when the loudspeaker is aimed at the occupied dance area instead of hard architectural surfaces. The angle should be calculated from the mounting height, audience distance, coverage pattern, and desired front-to-back uniformity. Too much tilt can leave the rear of the dance floor weak; too little can increase ceiling and wall reflections. The right result is a smooth listening field in which fewer people need excessive level to hear the music clearly.

  • Define listening zones. Separate the main dance floor, bar, dining area, entry route, and quiet or conversation zone. Each area should receive only the coverage it needs.
  • Use delay fills strategically. A correctly aligned fill can support the back of a room at a lower main-system level, preventing the front from becoming unnecessarily loud.
  • Control spill into calm spaces. Keep speakers away from open doors, reflective corridors, and seating areas where guests expect conversation.
  • Measure occupied conditions. Empty-room readings can be misleading because bodies, curtains, and furniture change absorption once the event begins.
  • Create a genuine quiet zone. A lower-level area gives guests a chance to recover, converse, and protect their hearing without leaving the event.

Zone management also improves musical flow. A dining area can remain conversation-friendly while the central floor builds momentum, and a bar can carry enough rhythm to feel connected without becoming another high-SPL hotspot. The WHO Global Standard for Safe Listening describes measures such as calibrated monitoring, sound optimization, quiet areas, and hearing protection as part of responsible amplified entertainment. Its guidance should be treated as a safety framework rather than a target to chase. A safe listening standard helps production teams balance excitement with exposure time, audience comfort, and staff protection.

Average exposure matters as much as a short peak. The WHO guidance identifies 100 dB LAeq over 15 minutes as a ceiling for audiences in its applicable safe-listening framework, not a recommended operating level. Children and staff may require more conservative treatment, and workers who remain near loud systems for an entire shift need particular attention. Provide earplugs, rotate crew positions where possible, communicate the sound plan, and keep the monitoring position representative of actual audience exposure.

Psychoacoustics and DJ Tactics for Maximum Perceived Loudness

The Fletcher-Munson relationship, more accurately described through equal-loudness contours, explains why the ear changes its sensitivity with level and frequency. At moderate levels, the ear is less responsive to deep bass and very high frequencies than to the midrange. That does not mean simply boosting those bands is wise. Excessive sub and treble can consume headroom, trigger limiters, and produce fatigue. A more effective approach is to make the kick fundamental, bass harmonics, vocal presence, and snare articulation work together so the arrangement feels energetic without becoming abrasive.

Harmonic saturation can help a bass instrument remain audible on smaller systems by creating upper harmonics that the ear detects more readily than the fundamental alone. Used gently, saturation on selected channels or buses can add density and perceived warmth. Dynamic EQ can control harshness only when it appears, leaving more average headroom for musical peaks. The DJ should avoid relying on a brickwall-limited master that removes contrast. Tracks with clean transients, purposeful drops, and space between competing parts often sound bigger at a lower meter reading than aggressively mastered material.

  • Choose tracks whose kick and bass occupy complementary ranges rather than competing for the same subwoofer headroom.
  • Use arrangement contrast, breakdowns, and controlled returns to make the next section feel larger without raising the entire system level.
  • Protect the 200 Hz to 500 Hz region from buildup, since excessive low-mid energy can make a room feel loud, crowded, and indistinct.
  • Maintain vocal and lead clarity so guests perceive detail, rhythm, and emotional direction even when the overall level is constrained.
  • Watch the meter during transitions, drops, and layered choruses, where accumulated energy can cause sudden limiter action.

Transform Tight Decibel Constraints into Your Ultimate Audio Advantage

Rigid limits encourage better sound design. They reward engineers who measure deliberately, DJs who curate dynamically, and production teams who think about coverage rather than simply turning up the master bus. Cardioid sub arrays can keep low-end pressure focused, down-tilted mains can reduce reflective spill, and zone-based reinforcement can make the entire venue feel connected without making every room equally loud.

The result is often a more enjoyable event for everyone. A controlled mix creates less fatigue, clearer vocals, tighter rhythm, and a stronger sense of anticipation when the music rises. Guests on the dance floor receive the impact, while guests at the bar or outside the main room retain comfort and conversation. Before the next soundcheck, use this final sequence:

  • Confirm the venue”s dBA, dBC, peak, and average limits, including the measurement position and time window.
  • Inspect the property line and identify doors, windows, walls, ceilings, and neighboring spaces that may transmit sound.
  • Design the subwoofer array for forward energy and rear rejection, then verify the result with calibrated measurements.
  • Aim, down-tilt, and delay the mid-high system so the dance floor receives clarity without unnecessary wall or ceiling reflections.
  • Set separate levels for each zone and provide a genuinely quieter area for recovery and conversation.
  • Build musical energy through contrast, harmonic detail, clean gain structure, and thoughtful track selection rather than constant loudness.
  • Record the soundcheck settings, brief the DJ and crew, and keep an operator responsible for monitoring throughout the event.

When decibel control becomes part of the creative plan, compliance stops feeling like a restriction and starts functioning as a design advantage. The dance floor does not need uncontrolled volume to feel powerful. It needs focused pressure, clean translation, smart timing, and an atmosphere that keeps the energy moving.


The Art of the Micro-Transition: How to Jump Music Genres Without Clearing the Floor

Why Slamming the Brakes Clears the Room

A dance floor rarely empties because the audience dislikes a new genre. More often, people leave the moment the physical logic of the music disappears. A sudden silence, an uncontrolled tempo cut, or a bassline that collides with the outgoing track tells dancers that the set has lost its direction. Standard stop-and-drop transitions can work as deliberate punctuation, but when used as a default solution they interrupt the body before the ear has had time to understand the change.

The solution is the micro-transition, a controlled pivot built from small musical signals rather than one dramatic reset. Tempo ratios, harmonic tension, rhythmic subdivision, filtered textures, and carefully chosen loops can move a room from Afrobeats to disco, hip-hop to techno, or garage to drum and bass without asking dancers to start over. A useful understanding of professional DJ entertainment begins with this principle: the audience does not need every track to belong to the same genre, but it does need each change to preserve a sense of momentum and intention.

Successful transitions protect audience trust. The kick may change, the swing may tighten, and the harmonic center may rise, but some recognizable feature should remain active: a pulse, a vocal phrase, a repeated subdivision, or the emotional temperature of the room. The DJ”s task is not simply to match songs. It is to manage the audience”s physical expectations while gradually rewriting them.

Crowded nightclub dance floor beneath vivid purple and blue beams
Strong transitions preserve the room”s momentum, allowing the crowd to embrace a new musical direction without losing its connection to the beat.

Mastering Half-Time and Double-Time Tempo Bridges

Half-time and double-time relationships are among the most powerful tools for crossing apparently distant genres. A track at 70 to 80 BPM can often be felt as moving at 140 to 160 BPM, depending on its snare placement, bass pattern, and vocal phrasing. That creates a natural bridge between slow hip-hop, trap, or dubstep and faster styles such as footwork, UK garage, and drum and bass. The numbers are not identical in musical feel, but the underlying pulse can be reinterpreted without forcing the crowd to abandon its movement.

The key is to distinguish the tempo the software displays from the pulse the dancers feel. A half-time groove may place its main snare on beat three, while a double-time track supplies more frequent kick and percussion events around the same underlying cycle. If the outgoing track ends on a phrase with clear space, the incoming track can enter with a restrained percussive pattern, allowing the room to discover the faster subdivision before the full drop arrives.

  1. Identify the shared pulse. Count the outgoing track in double-time and locate its strongest vocal, snare, or bass accents. Mark the point where the new track can be heard as either twice as fast or half as fast.
  2. Reduce the information before increasing the speed. Loop a vocal phrase, kick, clap, or percussion stem. Removing melodic clutter gives the audience a simple rhythmic reference while the tempo relationship changes.
  3. Introduce subdivisions gradually. Add eighth-note hats, shuffled percussion, or a short snare roll before bringing in the complete high-tempo groove. The body should feel acceleration as added detail, not as a sudden replacement.
  4. Land the phrase cleanly. Use an eight- or sixteen-bar structure when possible, then place the new track”s principal downbeat at the start of a fresh musical phrase. A clean arrival reassures the crowd that the change was planned.

This process is closely related to metric modulation, where one rhythmic value becomes the reference for a new meter or tempo. In practical DJ terms, the outgoing snare can become the incoming track”s perceived backbeat, or a repeated vocal syllable can act as the bridge between a loose half-time sway and a rapid four-on-the-floor pattern. The illusion works because dancers respond to relationships between accents, not only to the BPM display.

Loops are especially useful when the two tracks have different phrase lengths. A four-beat vocal or percussion loop can be repeated while the new rhythm develops underneath it, but avoid leaving the loop unchanged for too long. The aim is to preserve the listener”s orientation, not to create a mechanical holding pattern. Use filtering, a short delay, or carefully timed muting to reveal the new groove in stages.

Harmonic Modulation and the Camelot Jump Strategy

Harmonic mixing is most effective when treated as a map rather than a set of traffic laws. Adjacent Camelot Wheel moves are reliable because they limit key clashes, yet genre changes often require a more expressive leap. A deliberate modulation can create anticipation, urgency, or emotional lift, particularly when the incoming track introduces a brighter tonal center and a stronger rhythmic identity.

A one- or two-semitone upward move is a classic energy boost. The change can feel like the room has risen physically, especially when it arrives after a breakdown or a stripped-back vocal passage. A two-semitone lift is more pronounced than a one-semitone lift, so it should be reserved for moments where the arrangement has enough space to make the change feel intentional. Keep the melodic overlap brief if the keys are not fully compatible. A short phrase, vocal chop, or percussive entrance can deliver the lift without exposing a prolonged clash.

Modulation approach Best use Risk to manage
Adjacent Camelot move Long blends and melodic house or techno transitions Can sound predictable if used mechanically
One-semitone lift Subtle energy increase after a breakdown Extended melodies may rub against each other
Two-semitone lift Peak-time reveal or dramatic genre pivot Requires sparse overlap and precise phrasing
Diagonal or wider jump Creative transitions with simple melodic material Dissonance becomes obvious if both melodies remain exposed

When keys technically clash, use a bridge rather than forcing a direct blend. A bridge track, vocal texture, or instrumental loop can share the atmosphere of the outgoing record while introducing the bass movement, percussion, or harmonic color of the incoming one. This approach is valuable when tempo, rhythm, and key all disagree. The intermediary does not need to be played in full. A chopped intro, a sixteen-bar percussion section, or a filtered vocal fragment may be enough to prepare the room.

The most dependable material for harmonic jumps is simple material. Long sustained chords reveal dissonance quickly, while drums, single-note basses, vocal phrases, and short melodic motifs give the ear fewer conflicting details. Advanced harmonic mixing techniques also emphasize experimentation and restraint, particularly when using energy-boost moves. Let the modulation support the emotional direction of the set, not become a technical stunt that distracts from the dancers.

Polyrhythmic Layers that Bind Disparate Grooves

Rhythm can connect tracks even when their genres appear unrelated. A straight four-on-the-floor techno track and a syncopated Afrobeats record may share little in their surface patterns, yet a carefully chosen intermediate rhythm can make both meters audible at once. Three-against-four percussion, triplet shakers, swung hats, and repeating cross-rhythms soften the boundary between straight and syncopated movement.

Polyrhythm is the simultaneous presence of contrasting rhythmic groupings, and a clear explanation of the concept appears in this overview of polyrhythm. In a DJ set, the technique does not require a complex composition. A short triplet loop over a four-beat kick pattern may be enough to create a shared surface. The crowd continues to feel the stable pulse while the percussion suggests that a different dance language is approaching.

  • Anchor the floor with a stable pulse. Keep a low kick, bass hit, or muted four-count underneath the transition so dancers retain a dependable physical reference.
  • Layer a contrasting subdivision. Add a triplet percussion loop, three-note tom pattern, or shuffled shaker that reflects the syncopation of the incoming track.
  • Shape transients rather than adding volume. Shorten the attack of competing percussion, use filtering to remove unnecessary low end, and make space for the incoming groove.
  • Reveal the new rhythm in stages. Start with a high-frequency texture, then introduce the new bass and kick only when the phrase is ready to turn.

Afrobeats can fold into straight techno particularly well when the syncopated percussion is treated as a texture rather than a competing full-range rhythm section. A high-pass filter can leave the outgoing groove present while clearing the sub frequencies for the techno kick. Transient shaping, short loops, and restrained reverb help the incoming pattern feel sharper without making the transition sound overcrowded.

Use loop lengths with intention. A one-bar loop creates urgency, a two-bar loop allows a little conversational space, and a four- or eight-bar loop can support a more gradual handover. If the outgoing track has a strong vocal, isolate a phrase that lands naturally against the new rhythm. If the incoming track has a powerful bassline, keep the bridge focused on percussion until the exact point where the bass can arrive without masking the previous low end.

The bridge technique is especially effective when the two records share mood but not structure. A dark vocal atmosphere, a repeated synth note, or a similar spatial texture can remain while the rhythmic framework changes underneath. This lets the audience experience the transition as a continuation of the same emotional scene, even when the musical vocabulary has shifted.

Textural Washes and Echo Dissolves for Sudden Shifts

Some genre leaps are too extreme for a conventional blend. A bright disco chorus and a dense techno drop may have incompatible basslines, keys, and phrase structures, yet texture can temporarily separate rhythm from melody. Freeze delays, tail reverbs, band-pass filters, and controlled feedback allow the outgoing track to dissolve into atmosphere while the incoming track establishes a new physical center.

  • Freeze a meaningful fragment. Capture a vocal syllable, chord tail, or percussion hit that can sustain the mood for a few beats.
  • Filter the frozen sound. Remove low frequencies first, then narrow the midrange if the texture begins to compete with the incoming track.
  • Use delay as a countdown. Set the repeat so the final echo lands naturally at the end of a four-, eight-, or sixteen-bar phrase.
  • Release on beat one. Bring in the new kick, bassline, or full arrangement at the first beat of a fresh bar for maximum impact.

A pitch bend or vinyl-brake illusion can also work when used as deliberate punctuation. Lowering tempo and pitch together over a couple of bars creates a pattern interrupt, but it should be controlled manually and used sparingly. Repeating the effect teaches the audience to expect the trick, reducing its impact. A brake is strongest when the room has been given a clear reason to anticipate a reset, such as the end of a chorus, a requested track, or a carefully prepared peak moment.

Protect the downbeat. The most impressive effect is weakened if the new track arrives late or lands between phrases. Cue the incoming record early, count the release aloud or internally, and rehearse the effect at different energy levels. Texture should create a doorway, not a fog that hides timing errors.

Keep the Room Guessing While Keeping Every Foot Moving

The micro-transition toolkit is built from three connected ideas: use tempo ratios to reinterpret movement, use harmonic modulation to create controlled tension, and use rhythmic or textural bridges to give the ear a path forward. These methods allow a set to move across genres without relying on abrupt silence or an unexplained drop. The audience may hear a dramatic change, but the body still receives enough continuity to remain engaged.

Preparation makes experimentation safer. Organize tracks by functional qualities as well as genre, including half-time feel, double-time potential, key center, percussion density, vocal space, breakdown length, and likely bridge points. Practice several versions of the same transition, then choose the one that preserves the most energy with the least clutter. During a live set, watch the floor rather than the screen. Dancers leaning forward, raising their hands, or tightening their movement are giving useful information about the transition”s intensity.

There is no universal formula for every room. A festival crowd may welcome a dramatic modulation, while a private event may respond better to a shorter, more familiar bridge. The strongest DJs adjust the size of the transition to the audience”s confidence. Build complexity when the room is ready, simplify when attention is fragile, and always let the next track earn its arrival.

Genre freedom becomes a signature sound when every change feels purposeful. Keep the floor”s pulse intact, make tension audible, and treat each transition as a sequence of small decisions rather than a single effect. That is how a set can stay surprising without becoming unstable, moving from one musical world to another while every foot keeps moving.