
How to Build a High-Energy Dance Floor Under Strict Venue Decibel Limits
Why Decibel Caps Do Not Have to Kill the Party Vibe
The dreaded venue limiter can make an event feel compromised before the first track even plays. Event planners worry about complaints, sound engineers watch the meters, DJs fear sudden gain reduction, and venue managers must protect relationships with neighbors and local authorities. Yet a legal ceiling on measured sound pressure does not automatically mean a flat or lifeless dance floor. It simply changes where the craft begins.
Perceived loudness is a psychoacoustic experience, not a single peak number on a meter. A clean kick, controlled sub-bass, intelligible vocal range, and well-timed musical rise can make a room feel powerful without filling every corner with uncontrolled energy. The winning approach is to move away from raw volume and toward focused physical pressure, precise coverage, and deliberate musical contrast. With the right system design, the dance floor can feel alive while the property line remains protected.
Mastering the Measurement Game dBA versus dBC Explained
Sound level meters apply weighting curves because the human ear does not hear every frequency with equal sensitivity. A-weighting, written as dBA, reduces the contribution of very low and very high frequencies and places greater emphasis on the midrange, where hearing is most sensitive at moderate listening levels. This makes dBA useful for many general noise assessments and explains why it is frequently found in venue policies, permits, and municipal guidance.
That usefulness has limits in bass-heavy entertainment. Deep sub-bass may contribute strongly to physical sensation while contributing less to an A-weighted reading. C-weighting, or dBC, applies far less attenuation to low frequencies, giving a clearer picture of the rumble and pressure that can travel through floors, walls, and building structures. A system can therefore appear compliant on a dBA meter while still producing low-frequency disturbance that reaches nearby apartments or businesses. Monitoring both curves gives the engineer a more complete picture of audience impact and neighborhood risk.
| Measurement | What it emphasizes | Practical value for events |
|---|---|---|
| dBA | Midrange frequencies associated with hearing sensitivity | Often used for venue limits and general audience exposure assessments |
| dBC | Low-frequency energy and bass pressure | Reveals rumble, structural transmission, and potential neighbor complaints |
| Peak SPL | Short-duration maximum level | Helps identify sudden transients that can trigger limiters or discomfort |
| LAeq | Time-averaged A-weighted level | Shows how exposure accumulates during a defined listening period |
Before soundcheck, confirm exactly what the venue measures, where the microphone is positioned, whether the limit is an average or a peak, and whether separate dBA and dBC thresholds apply. Consult an Authoritative Source for the applicable rules, while Local noise code guidance illustrates why regulations must be checked before the event rather than interpreted during a crisis. Meter placement, calibration, reflective surfaces, building construction, and the measurement time window can all affect the result. A responsible engineer should also keep a second monitoring position near the most sensitive boundary when practical.
Directional Acoustic Physics Subwoofer Arrays That Protect Property Lines
Standard subwoofer placement often wastes energy. A single cabinet or loosely spaced pair radiates substantial low-frequency output behind the DJ booth and toward side walls, where it contributes little to the dancers but can excite the venue structure. Low frequencies are difficult to contain with ordinary barriers, so the strongest solution is usually directional control at the source.
Cardioid subwoofer arrays use carefully timed sources and phase relationships to reinforce bass toward the audience while creating cancellation toward the rear. End-fire arrangements place cabinets in a line with progressive delay, while gradient arrangements use front and rear sources with polarity and delay adjustments. The result is not perfect isolation, and room reflections still matter, but rear rejection can significantly reduce unnecessary energy outside the dance zone. Modern powered subs with DSP can simplify this work through presets, alignment delay, polarity inversion, crossover control, and dedicated cardioid modes. For example, the DRM18S powered subwoofer includes system processing and cardioid-array support designed for professional deployment.
- Map the room first. Mark the dance floor, DJ position, audience edges, walls, residential boundaries, and any elevated or vulnerable structures. The array should face the people who need the energy, not simply the geometric center of the room.
- Choose the array geometry. Use a gradient configuration when rear rejection is the primary concern and an end-fire configuration when forward directivity and extended throw are more important. Follow the manufacturer”s spacing and processing requirements rather than improvising cabinet distances.
- Apply delay and polarity carefully. Set the manufacturer”s recommended DSP values, verify polarity, and confirm that cabinets are acoustically aligned at the intended listening position. Small timing errors can reduce forward summation and weaken the very punch the array is meant to create.
- Measure front and rear positions. Compare levels and frequency response in front of the array, behind it, and at the property-line direction. Check both dBA and dBC, because rear rejection that looks impressive in one weighting may be less effective in another.
- Lock the system after verification. Protect the DSP settings from accidental changes, establish a conservative operating limit, and communicate the approved gain structure to the DJ and production team.
Array control works best when combined with sensible crossover choices. Excessive sub overlap with the tops can make the low-mid region thick, reducing clarity while increasing meter activity. A clean crossover, controlled infrasonic content, and high-pass filtering where appropriate often produce a stronger kick because each system component is working within its useful range. The objective is not maximum subwoofer output everywhere. It is a concentrated, coherent impact where the crowd is dancing.
Focusing the Mid-High Energy Down-Tilting and Zone Management
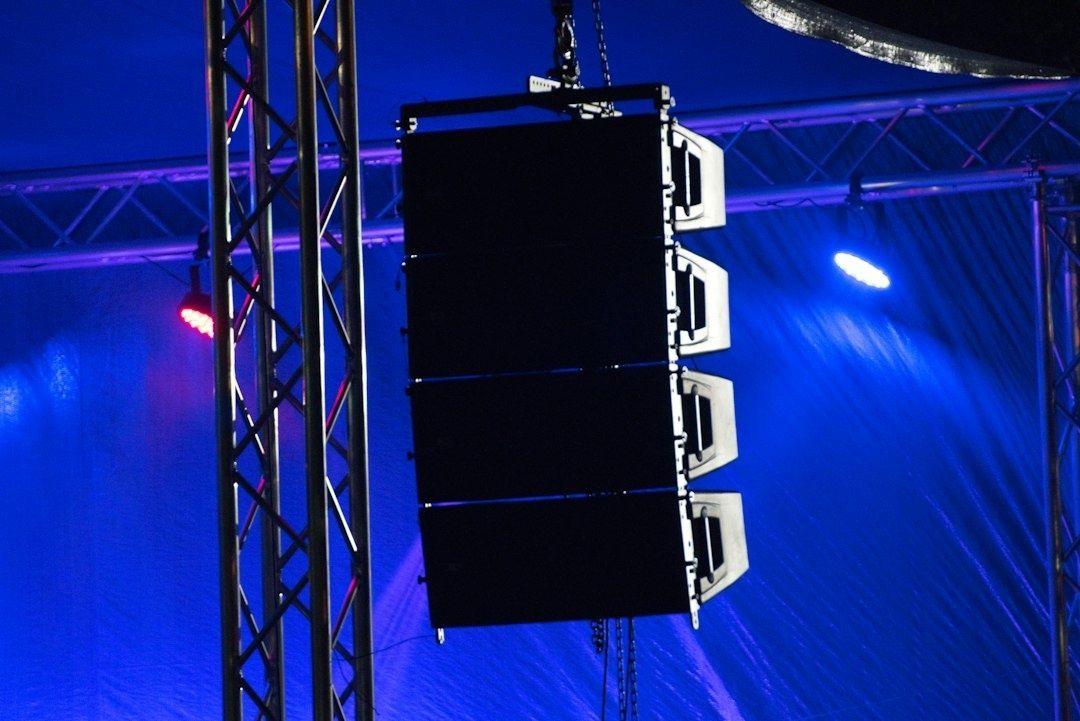
Mid and high frequencies are easier to direct than sub-bass, which makes speaker aiming one of the most valuable tools under a strict limit. Point-source speakers aimed horizontally can send sound into rear walls, windows, corridors, and chill-out areas. Those reflections increase room wash, reduce intelligibility, and create complaints without adding much value to the main floor.
Down-tilting the main speakers places high-frequency energy into the audience rather than above it. Human bodies absorb significant mid and high-frequency content, especially when the loudspeaker is aimed at the occupied dance area instead of hard architectural surfaces. The angle should be calculated from the mounting height, audience distance, coverage pattern, and desired front-to-back uniformity. Too much tilt can leave the rear of the dance floor weak; too little can increase ceiling and wall reflections. The right result is a smooth listening field in which fewer people need excessive level to hear the music clearly.
- Define listening zones. Separate the main dance floor, bar, dining area, entry route, and quiet or conversation zone. Each area should receive only the coverage it needs.
- Use delay fills strategically. A correctly aligned fill can support the back of a room at a lower main-system level, preventing the front from becoming unnecessarily loud.
- Control spill into calm spaces. Keep speakers away from open doors, reflective corridors, and seating areas where guests expect conversation.
- Measure occupied conditions. Empty-room readings can be misleading because bodies, curtains, and furniture change absorption once the event begins.
- Create a genuine quiet zone. A lower-level area gives guests a chance to recover, converse, and protect their hearing without leaving the event.
Zone management also improves musical flow. A dining area can remain conversation-friendly while the central floor builds momentum, and a bar can carry enough rhythm to feel connected without becoming another high-SPL hotspot. The WHO Global Standard for Safe Listening describes measures such as calibrated monitoring, sound optimization, quiet areas, and hearing protection as part of responsible amplified entertainment. Its guidance should be treated as a safety framework rather than a target to chase. A safe listening standard helps production teams balance excitement with exposure time, audience comfort, and staff protection.
Average exposure matters as much as a short peak. The WHO guidance identifies 100 dB LAeq over 15 minutes as a ceiling for audiences in its applicable safe-listening framework, not a recommended operating level. Children and staff may require more conservative treatment, and workers who remain near loud systems for an entire shift need particular attention. Provide earplugs, rotate crew positions where possible, communicate the sound plan, and keep the monitoring position representative of actual audience exposure.
Psychoacoustics and DJ Tactics for Maximum Perceived Loudness
The Fletcher-Munson relationship, more accurately described through equal-loudness contours, explains why the ear changes its sensitivity with level and frequency. At moderate levels, the ear is less responsive to deep bass and very high frequencies than to the midrange. That does not mean simply boosting those bands is wise. Excessive sub and treble can consume headroom, trigger limiters, and produce fatigue. A more effective approach is to make the kick fundamental, bass harmonics, vocal presence, and snare articulation work together so the arrangement feels energetic without becoming abrasive.
Harmonic saturation can help a bass instrument remain audible on smaller systems by creating upper harmonics that the ear detects more readily than the fundamental alone. Used gently, saturation on selected channels or buses can add density and perceived warmth. Dynamic EQ can control harshness only when it appears, leaving more average headroom for musical peaks. The DJ should avoid relying on a brickwall-limited master that removes contrast. Tracks with clean transients, purposeful drops, and space between competing parts often sound bigger at a lower meter reading than aggressively mastered material.
- Choose tracks whose kick and bass occupy complementary ranges rather than competing for the same subwoofer headroom.
- Use arrangement contrast, breakdowns, and controlled returns to make the next section feel larger without raising the entire system level.
- Protect the 200 Hz to 500 Hz region from buildup, since excessive low-mid energy can make a room feel loud, crowded, and indistinct.
- Maintain vocal and lead clarity so guests perceive detail, rhythm, and emotional direction even when the overall level is constrained.
- Watch the meter during transitions, drops, and layered choruses, where accumulated energy can cause sudden limiter action.
Transform Tight Decibel Constraints into Your Ultimate Audio Advantage
Rigid limits encourage better sound design. They reward engineers who measure deliberately, DJs who curate dynamically, and production teams who think about coverage rather than simply turning up the master bus. Cardioid sub arrays can keep low-end pressure focused, down-tilted mains can reduce reflective spill, and zone-based reinforcement can make the entire venue feel connected without making every room equally loud.
The result is often a more enjoyable event for everyone. A controlled mix creates less fatigue, clearer vocals, tighter rhythm, and a stronger sense of anticipation when the music rises. Guests on the dance floor receive the impact, while guests at the bar or outside the main room retain comfort and conversation. Before the next soundcheck, use this final sequence:
- Confirm the venue”s dBA, dBC, peak, and average limits, including the measurement position and time window.
- Inspect the property line and identify doors, windows, walls, ceilings, and neighboring spaces that may transmit sound.
- Design the subwoofer array for forward energy and rear rejection, then verify the result with calibrated measurements.
- Aim, down-tilt, and delay the mid-high system so the dance floor receives clarity without unnecessary wall or ceiling reflections.
- Set separate levels for each zone and provide a genuinely quieter area for recovery and conversation.
- Build musical energy through contrast, harmonic detail, clean gain structure, and thoughtful track selection rather than constant loudness.
- Record the soundcheck settings, brief the DJ and crew, and keep an operator responsible for monitoring throughout the event.
When decibel control becomes part of the creative plan, compliance stops feeling like a restriction and starts functioning as a design advantage. The dance floor does not need uncontrolled volume to feel powerful. It needs focused pressure, clean translation, smart timing, and an atmosphere that keeps the energy moving.
By Magnus
- 12, Oct, 2026
- 0 Comments